Getting started with asp.net core razor pages
ASP.Net core 2 and above have the concept of razor pages which is an interesting useful addition. It is quite similar to asp.net web forms model.
Unlike MVC views & controllers , razor pages have a view and tightly coupled code which executes when various actions are taken on that view (as I said its more like asp.net web forms). So in that sense it is more focused on a one particular functionality.
Lets take an example of file upload using razor pages and I’ll walk you through the basic setup of a simple razor page following default conventions.
Just note that this blog post uses ASP.NET core 3 and above and for lower versions there might be some changes required. Also in this blog post I will show you creating razor pages only using the default conventions and in the next post I will show how to customize and override these conventions when required.
Adding razor page
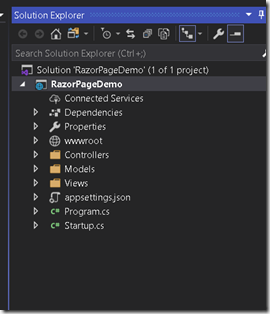
If you have an existing MVC application then the folder structure would mostly look like as shown below.
Razor pages by convention are added to ‘Pages’ folder .This is the default convention (similar to how controllers are added to ‘Controllers’ and view are added to ‘Views’ folder in MVC) but can be overridden if required. This means that if you add pages to some other folder or the root folder it wont work unless you override the convention.
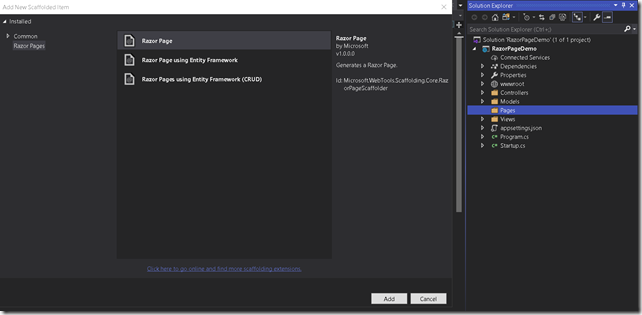
So first create a folder named ‘Pages’ and then right click the folder > Add > Razor Page.
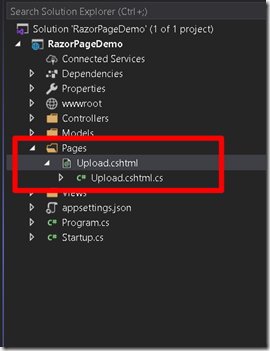
Lets call this page Upload.cshtml. If you notice you can see that this page has a cshtml file and associated ‘code behind’ .cshtml.cs file as well.This is the preferred place where all the c# code should be written .Although its totally possible to write the C# logic inline in cshtml page as well.
Next we can add the required view html for uploading the file.
@model Beetle.Views.ManageExpenses.ImportModel
@{
}
<h1>Upload</h1></p>
<form enctype="multipart/form-data" method="post">
<dl>
<dt>
<label asp-for="UploadedFile"></label>
</dt>
<dd>
<input asp-for="UploadedFile" type="file">
<span asp-validation-for="UploadedFile"></span>
</dd>
</dl>
<input class="btn" type="submit" value="Upload" />
</form>
Routing
By convention razor page routes are directly mapped to the physical files i.e. If you have file upload.cshtml inside ‘Pages’ folder than the route to access the page would be www.yourdomain.com/upload.
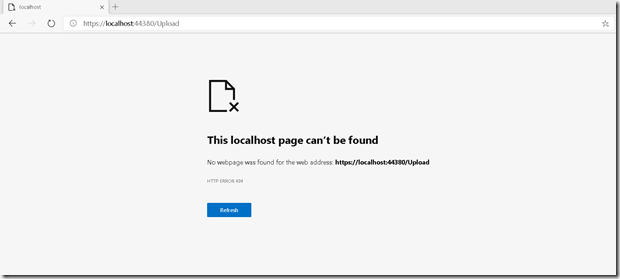
Lets try this on our current application .
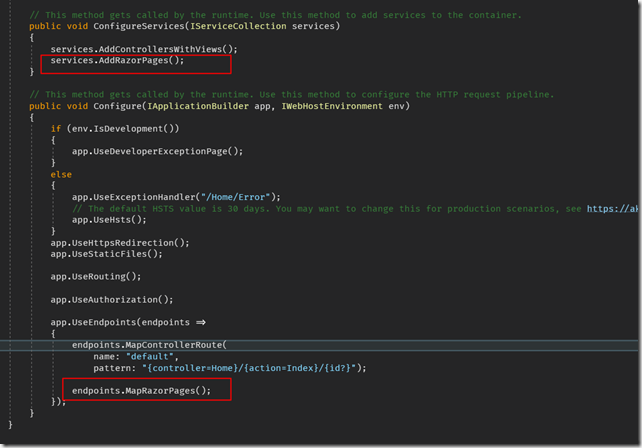
Hmm…the result is not as we expected. And the reason being we need to specifically enable the support for razor pages inside startup.cs by adding following lines.
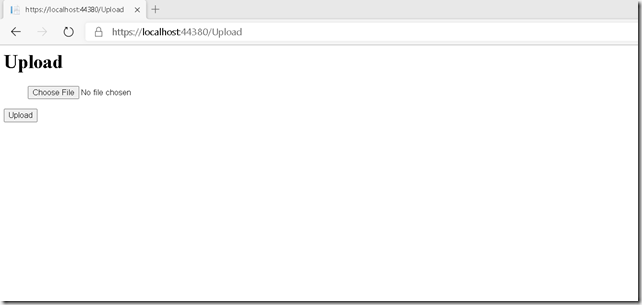
Lets try again. An we finally have the expected outcome.
Next lets write the backend handler for handling the upload requests.
Handler methods
Handler methods are backend methods which are executed when request is made from the html view in the browser. Again following conventions, razor pages automatically map the request based on its http verb to the corresponding handler method. The convention followed is simple and looks like On<VerbName> i.e. if its a GET request then the handler for that would be OnGet() ,POST request OnPost() and so on.
We will add a POST request handler in our code so that we can receive the uploaded file. On clicking upload we see that we are hitting our OnPost() method but the uploaded file parameter is coming as null.
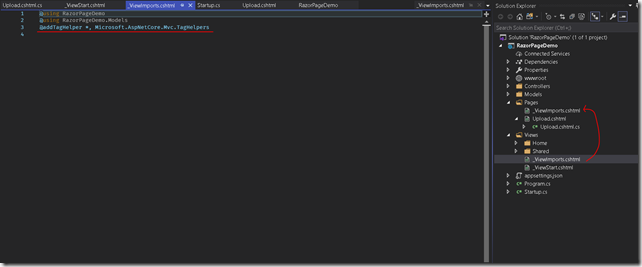
I had to struggle with this a lot but in the end it was a stupid mistake due to missing a very important concept that your razor pages and your view do not share your common files like _viewstart.cshtml,_viewimport.cshtml ,_layout.cshtml etc.
In my case it was because I was not including reference assembly for tag helpers (since its defined in _viewimport.cshtml and the file is not shared between razor pages and views) so all the tag helpers (Refer this for knowing more about tag helpers) were being rendered as is as shown below in the “View Page source” screenshot.
To fix this I just had to copy the _ViewImports.cshtml file from Views folder to Pages folder.
And now I am getting the correct uploaded file.
And just for comparison now the page source looks correct.
Model binding
As you noticed above, in razor pages the code behind class also works as a model for the view and is similar to two way data binding. So all the properties defined in the UploadModel class above would be available for binding in the view and after posting the data code behind class properties will be automatically bound by corresponding fields in the view.
Alternatively , In the above example we could have also passed parameter in the OnPost method e.g. OnPost(IFormFile UploadedFile) and that would have also worked. These are the two default ways of databinding but as always there are other customized ways as well.
This is how we can add fully functional razor page functionality just by using default conventions.
To learn more on asp.net core and razor pages you can refer this pluralsight course.
