Using azure active directory authentication in your web application
Azure active directory (AD) provides cloud based directory and identity management services.You can use azure AD to manage users of your application and authenticate access to your applications using azure active directory. You can learn more above azure AD at this msdn article.
In this blog post I will show how to integrate azure active directory with your application so that you can authenticate with Azure AD.
Register your application with Azure active directory tenant
For this you need to login to your azure active directory tenant and register your application so that AD identifies the application which is requesting for authentication.Below are the step
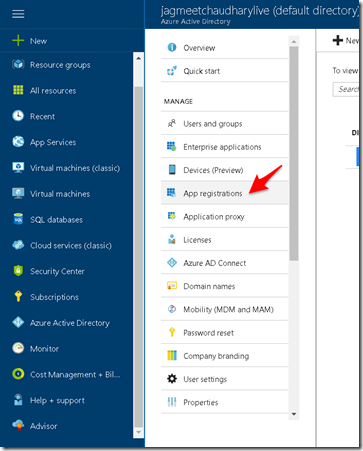
1. Login to your active directory tenant and go to ‘App Registrations’
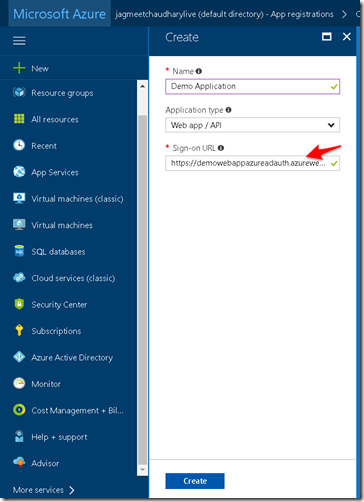
2. Give name of your application for registration and the Sign-on URL of the application (in my case it is the home page default url : https://demowebappazureadauth.azurewebsites.net/ . Next click Create.
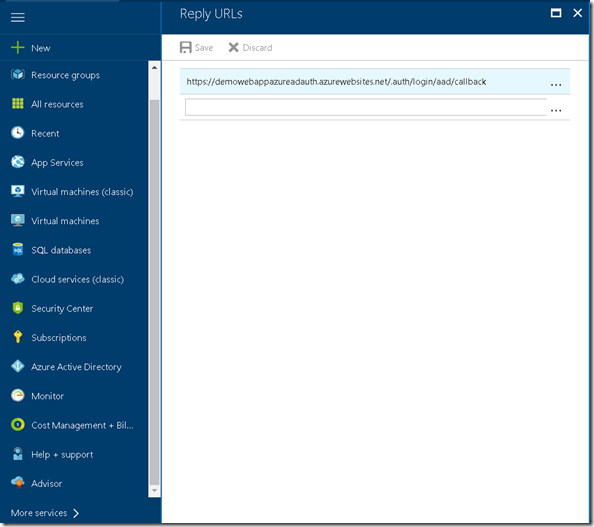
3. Next configure the Reply URL.This is the url where Azure AD would send authentication response and token (if authentication is successful). To know more about how reply url works go to this very good article on the topic.
To derive the reply url just append /.auth/login/aad/callback to your single sign-on url.
This completes your application’s registration with Azure AD. Next we will configure the web application to provide application information regarding the Azure AD which will be used for authentication.
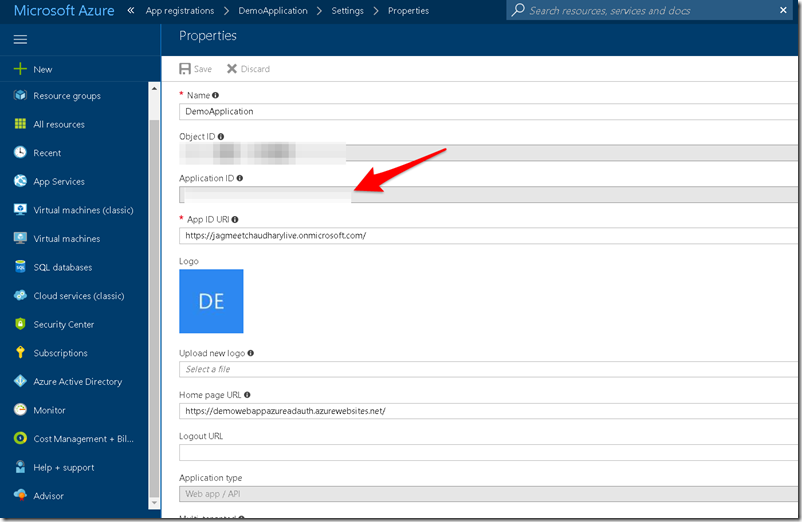
For this step we need Client ID and Issuer URL from the App registration we just completed.
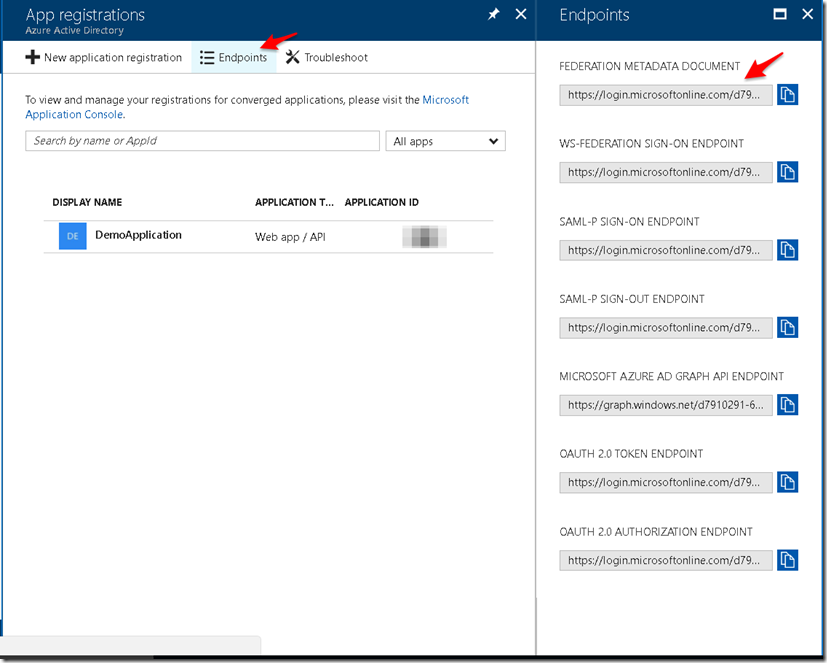
- To get the Client ID go the App Registrations and click on your application.The Application ID mentioned is the client id.
- To get the Issuer Url go to App Registrations > Endpoints and download the Federation metadata document.
- Now pick the entityID value mentioned which is your Issuer Url.
Configure web application to use Azure active directory tenant
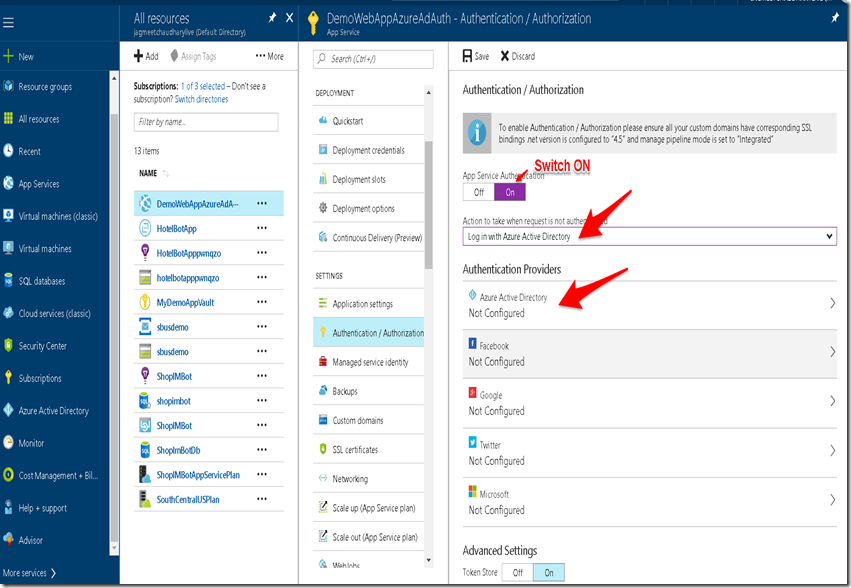
1.Navigate to your published web application in azure and go to Authentication / Authorization section.Fill in the options as shown in below screenshot and Click on Azure Active Directory.
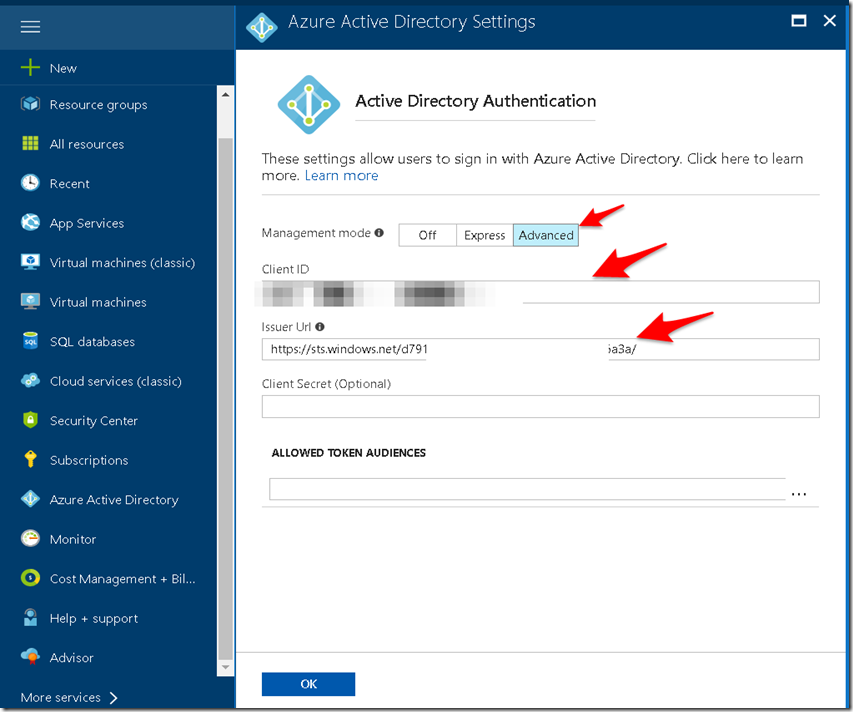
2. Configure Azure active directory authentication by providing ClientID and Issuer URL.
This completes your application configuration.Now just browse to your single sign on url and if you are not authenticated then you would see an azure AD login page as shown below.
In this blog I touched upon how to integrate azure AD authentication with a simple asp.net web application.There are couple of other scenarios while integrating azure AD with other kind of application types viz. SPA calling Web API, native application ,Web app calling web api etc. In case you want to learn about all these scenarios I will recommend going through this pluralsight course which covers most of them with examples.


Pingback: Storing application secrets in Azure key vault | Coding Canvas
Pingback: Using azure key vault secret in your application | Coding Canvas
Why do you need the entityID for?